
Cortex | Administration | Factors
Manage factors (Administration)
 Only users who are set up as administrators in Cortex have access to this feature.
You can set up rate tables to normalize (adjust) your historical project costs for various factors, such as time and location, productivity by region, and project complexity.
How do rate tables work?
A rate table is based on one or two factors called dimensions. For example, a rate table named Productivity that adjusts project labor hours and cost based on productivity by region might be based on a single dimension named Region. You specify which dimension to use for the Table rows. To base the table on two dimensions, you also select a dimension to use for the Table columns.
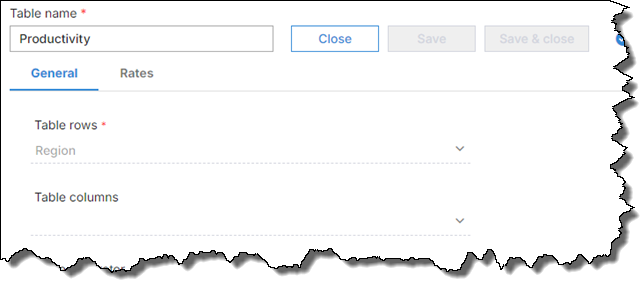
Each dimension is associated with a Reference field. This is a project field or item field that Cortex Project History looks at to determine how to pull rates. You need to ensure that any fields you want to associate with dimensions are set up in Fields > Project fields > Fields and Fields > Item fields > Fields.
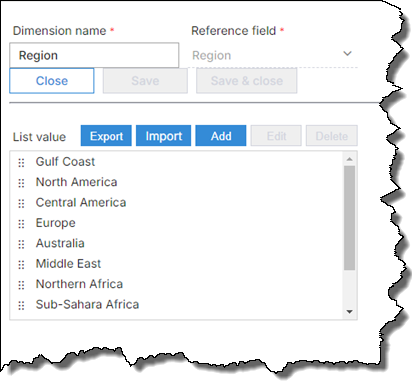
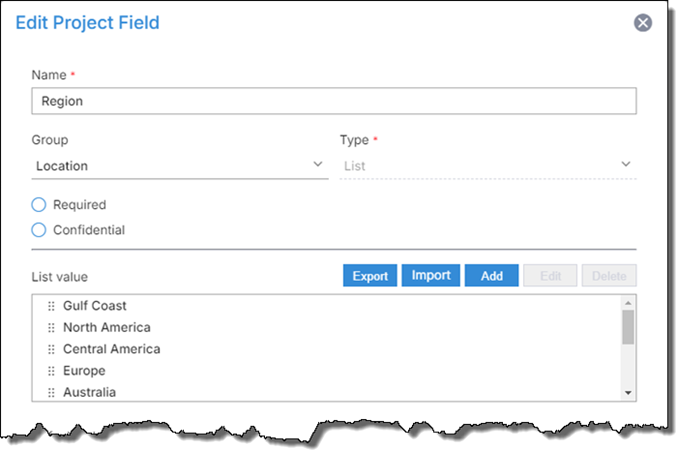
In our example, the Reference field that the Region dimension is associated with is the Region project field. This is a list field. The Region project field list values include Gulf Coast, North America, Central America, Europe, Australia, and so on. These are the countries or locales where your company operates.
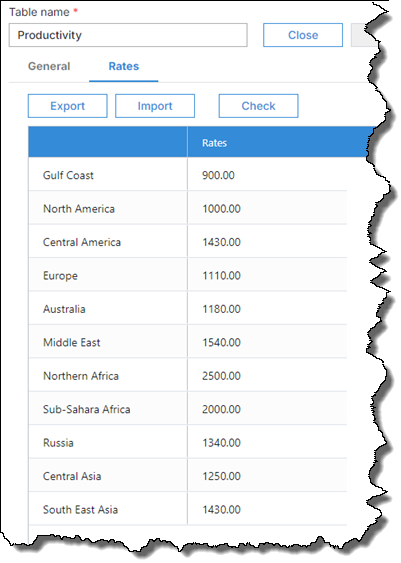
Looking at the Rates tab for our example rate table, you can see the dimension list values (Gulf Coast, North America, Central America, etc.) and the rate associated with each value.
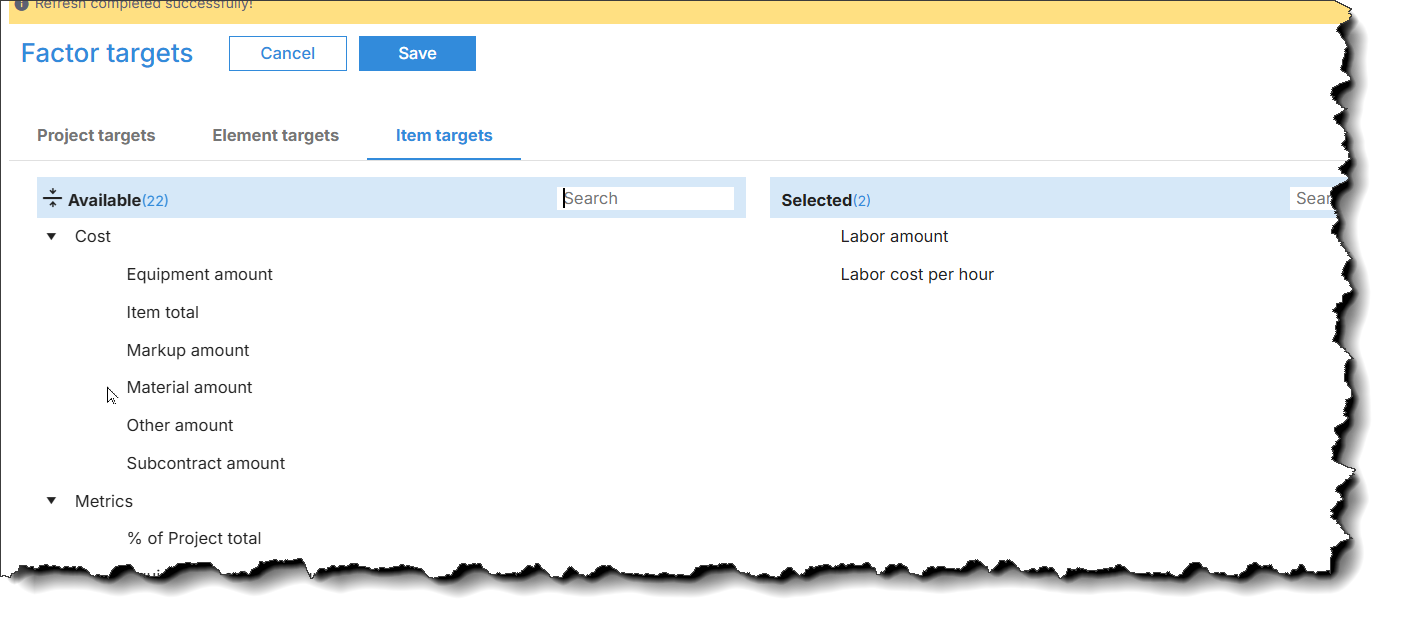
On the Project targets and Item targets tabs, you identify what you want to adjust using this rate table. In this example, you want to adjust direct labor only (hours and cost). To accomplish this, you move the Labor amount and Labor cost per hour fields to the Selected list on the Item targets tab.
Two-dimensional rate table example
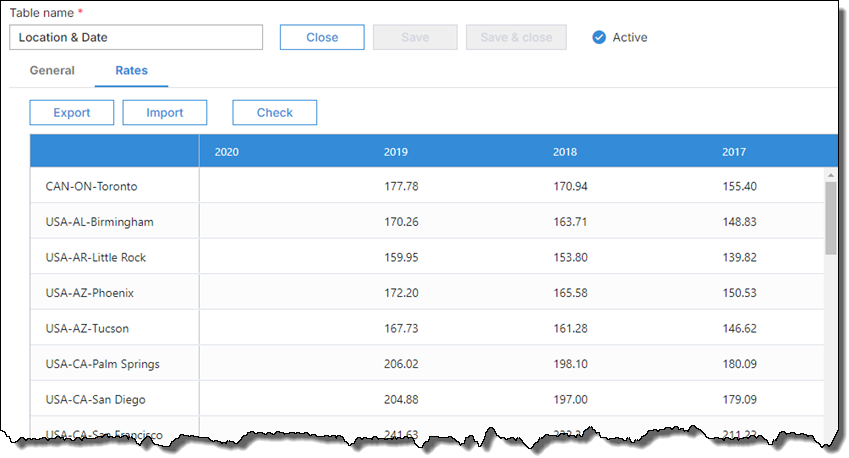
Location & Date is an example of a two-dimensional rate table that you might set up. It is based on where the project was built (dimension 1, Table rows) and when it was originally built (dimension 2, Table columns):
- Dimension 1 is State-City. It's associated with the Project location reference field, a project-level field. The range values for this dimension are used for the rows in the rate table.
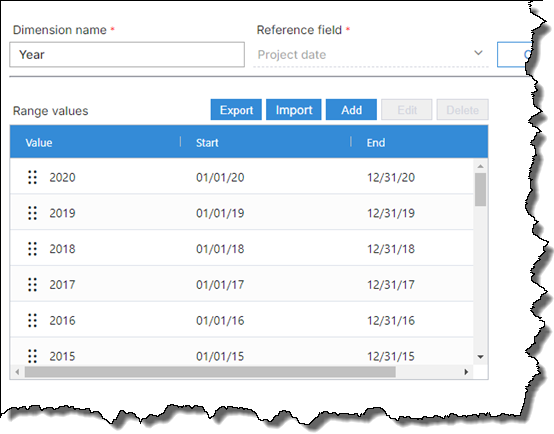
- Dimension 2 is Year. It's associated with the Project date reference field, another project-level field. The range values for this dimension are used for the columns in the rate table. Each year range has a Start value of 01/01 and an End value of 12/31.
You can see the rates on the Rates tab. The row labels are the dimension 1 Project location) list values and the column labels are the dimension 2 (Year) range values.
When you apply factors for Location & Date, the system checks the project's Project location and Project date to look up the appropriate multiplier (rate) to apply to the project specified in the rate table. For example, you might have set up the rate table to apply the multiplier to the total project cost.
How does the system calculate the rate that is applied?
Let’s say you have a project that was built in Birmingham, AL in 2002 and you want to adjust the costs to San Francisco, CA 2018.
The rate for Birmingham, AL in 2002 is 111.84 and the rate for San Francisco, CA in 2018 is 232.34. To calculate the applied rate, the system divides the target rate (232.34) by the project's native rate (111.84) and multiplies the result by 100:
(232.34/111.84)*100 = 207.74
Factor settings
Use the Settings to control whether the following functionality is available to users in Cortex Project History:
- Use currency conversions: This check circle determines whether users can convert currency in Cortex Project History.
If you clear this check circle, users will not be able to convert currency, and settings and fields related to currency conversions will not be visible in Cortex Project History. For example, when this check circle is cleared, the Currency list is not available in the Apply Factors and Manage Saved Factors windows and you cannot set up currency tables in the Administration module.
- Use unit conversions: This check circle determines whether user can convert quantities to other unit systems (Imperial to metric, or metric to Imperial) in Cortex Project History.
If you clear this check circle, users will not be able to convert quantities to other unit systems, and related settings and fields related will not be visible in Cortex Project History. For example, when this check circle is cleared, the Units list is not available in the Apply Factors and Manage Saved Factors windows.
- Use normalizations: This check circle determines whether users can apply normalizations via rate tables to projects in Cortex Project History. If you have active rate tables in the system, you must deactivate all of them before you can clear this check circle.
If you clear this check circle, users will not be able to apply normalizations, and settings and fields related to normalizations will not be visible in Cortex Project History. For example, when this check circle is cleared, the Normalizations section does not display in the Apply Factors and Manage Saved Factors windows.
By default, after you install Cortex Project History, the Conversions settings are cleared and the Normalizations setting is selected..
How do I?
Set up reference fields for rate tables
Set up dimensions for rate tables
Mark rate tables active/inactive
Manage adjustments for factors
Manage factor targets for rate tables
Manage currency units and conversions
The Factors > Settings option is not available in Cortex 365. The currency conversion and unit conversion features are not included in Cortex 365