
Cortex Project History | Create a New Project
Create a new project
What is the process for creating a new project?
The process for creating a new project varies based on whether you have a project that's similar to the project you want to create.
- If you have a project that's similar...
You start by locating the project in Cortex Project History that is similar to the project you want to create, and then you generate a Microsoft Excel template (called a project import template) for that project. You modify the project fields and estimate items in the project import template as needed for the new project. When you finish making changes, you import the template into Cortex Project History to create the new project. - If you don't have a similar project...
You start by generating a blank (empty) project import template (a blank template contains the project and item fields you want to use for creating projects in Cortex Project History, but does not contain any data for those fields) using the factory template (All fields) included with Cortex Project History or one of your company's templates. Next you enter values for the project fields and estimate items as needed for the new project. When you finish, you import the template into Cortex Project History to create the new project.
Important. The Project ID specified in the import template controls whether Cortex Project History uses the information in the import template to update an existing project in the system or create a new project:
- Replace an existing project: If the Project ID in the import template matches the Project ID of a project in the system, Cortex Project History replaces all of the existing information for the project with the project information in the import template.
- Create a new project: If the Project ID in the import template does not match the Project ID of a project in the system, Cortex Project History creates a new project using the information in the import template.
How do I?
Create a new project using a similar project
Creating a new project by copying an existing project
- Find and select the project you want to use as the basis for creating your new project.
- Note that if you have applied conversions and normalizations to this project, Cortex Project History uses the project's adjusted values to create the new project.
- On the single project page, select Copy next to the project name.
- Rename the new project and assign an ID, then select Save & open.
- Review the copied details.
Creating a new similar project by using a template
- Find and select the project you want to use as the basis for creating your new project.
- Note that if you have applied conversions and normalizations to this project, Cortex Project History uses the project's adjusted values to create the new project.
- On the single project page, click
 .
- Select the Download import template with data option, and then select the import template to use. Click OK.
- Cortex Project History exports all the data from the project into the project import template, organizes it onto two worksheets, and opens the template in Microsoft Excel when the export is complete:
- Project: This worksheet lists all the project fields along with their values. Required fields are marked with a red asterisk (*). Clear the project field values and enter the appropriate values for the new project, as needed. Be sure to enter a new, unique Project ID that isn't already used by another project to ensure that Cortex Project History creates a new project during the import.
The field rows are grouped using headings. Use the level controls to expand and collapse field groups as desired while you enter values.
What is the Comment column used for?
You can enter additional information about project attribute values in the Comment column as needed. For example, you might want to explain why the value for the Conditions of performance attribute is Very difficult.
After you import a project using the import template, attribute value comments are available wherever the attribute value displays for the project:
- Single project page when reviewing attributes and KPIs
- Project collection
- Compare projects page
To see a comment, hover on  and click the hover tip to open the Comment window.
Attribute comments can be marked as Important and will display as orange.
To see the minimum amount of information you need to enter in the template to create the project, filter the Project sheet by the * column to show only the fields that contain a red asterisk (*)—these are the required fields.
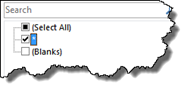
- Item: This worksheet contains all the individual estimate items (called items). Delete or add items and change item values as needed. Note that Cortex will not import an item record unless it has a description in the template. The Description is required.
- Save the template.
- In Cortex Project History, click
 (next to the logo at the top of the browser window) and select Project imports/updates from the menu.
 Only users who are set up as administrators in Cortex have access to this feature.
- Drag the Excel project import file and drop it on the Project imports/updates page. You can also click Select file to browse to the import file, select it, and then click OK.
The status of the import displays in the grid at the bottom of the page.
The system performs minimum validation on the import file to ensure that it uses a valid import template and contains the necessary data to work properly in Cortex Project History. For example, every project must have a project date and project location.
Learn about the Existing Project ID Warning
When a project ID in the import template matches a project ID in Cortex, the system warns you that the import process will replace the project with the project data in the import template. Your response to the warning determines whether the existing project is replaced or skipped during the import. You can also choose the replace the project field values, replace the items, or replace both.
To apply your response to all matching projects found during the import process and dismiss all future project replacement warnings, select the Apply to all when importing multiple project updates check circle; otherwise, clear this check circle. When this option is selected, a yellow banner displays at the top of the Project imports/updates page alerting you that you opted to either replace projects or skip importing projects when the project ID matches and that all future project replacement warnings will be dismissed. This setting persists for all future project imports until you click the reset link in the banner.
- To replace the existing project, click Replace project.
- To replace the project field values, click Replace project field values.
- To replace the project items, click Replace item.
- To skip the import for this project, click Skip.
When the import finishes successfully, Published appears in the Status column and New appears in the Event type column.
- Review the import details.
To open the results on a separate browser tab, click the import status (Published, Failed, etc.) in the Status column.
Check the Warnings and Errors columns in the results grid to see if any warnings or errors occurred during the import. If warnings or errors did occur, click the warning or error count to filter the results to show only the warnings or errors. To remove the filter, click  in the column heading, and then click Reset in the filter pane.
Note that you can sort and filter the import results by any of the columns.
Create a new project using a blank project import template
- Click Download import template on the
 menu and select the project import template to use for creating the new project.
- Cortex Project History opens the blank project import template in Microsoft Excel. The template has two worksheets:
- Project: Enter values for the project fields on this worksheet. Required fields are marked with a red asterisk (*). Be sure to enter a new, unique Project ID that isn't already used by another project to ensure that Cortex Project History creates a new project during the import.
The field rows are grouped using headings. Use the level controls to expand and collapse field groups as desired while you enter values.
What is the Comment column used for?
You can enter additional information about project attribute values in the Comment column as needed. For example, you might want to explain why the value for the Conditions of performance attribute is Very difficult.
After you import a project using the import template, attribute value comments are available wherever the attribute value displays for the project:
- Single project page when reviewing attributes and KPIs
- Project collection
- Compare projects page
To see a comment, hover on  and click the hover tip to open the Comment window.
To see the minimum amount of information you need to enter in the template to create the project, filter the Project sheet by the * column to show only the fields containing an asterisk (*).
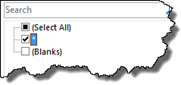
- Item: This worksheet contains all the individual estimate items (called items). Enter values for the item fields on this worksheet.
- Save the template.
- Click Project imports/updates on the
 menu.
Drag the Excel project import file and drop it on the Project imports/updates page. You can also click Select file to browse to the import file, select it, and then click OK.
The status of the import displays in the grid at the bottom of the page.
The system performs minimum validation on the project import file to ensure that it uses a valid template and contains the necessary data to work properly in Cortex Project History. For example, every project must have a project date and project location.
Learn about the Project Replacement Warning
When a project ID in the import template matches a project ID in Cortex, the system warns you that the import process will replace the project with the project data in the import template. Your response to the warning determines whether the existing project is replaced or skipped during the import.
To apply your response to all matching projects found during the import process and dismiss all future project replacement warnings, select the Apply to all when importing multiple project updates check circle; otherwise, clear this check circle. When this option is selected, a yellow banner displays at the top of the Project imports/updates page alerting you that you opted to either replace projects or skip importing projects when the project ID matches and that all future project replacement warnings will be dismissed. This setting persists for all future project imports until you click the reset link in the banner.
- To replace the existing project, click Replace project.
- To skip the import for this project, click Skip.
When the import finishes successfully, Published appears in the Status column and New appears in the Event type column.
- Review the import details.
To open the results on a separate browser tab, click the import status (Published, Failed, etc.) in the Status column.
Check the Warnings and Errors columns in the results grid to see if any warnings or errors occurred during the import. If warnings or errors did occur, click the warning or error count to filter the results to show only the warnings or errors. To remove the filter, click  in the column heading, and then click Reset in the filter pane.
Note that you can sort and filter the import results by any of the columns.
Download a previously imported template
This is helpful when you need to update a project using a customized import template.
- Click Project imports/updates on the
 menu to display the Project imports/updates page.
- Review the import project history and locate the import template you want to download. In the Import file column, click the template's file name to download it to your computer.
Tips
- The Project imports/updates page is updated whenever you access it by selecting Project imports/updates from the
 menu. Other users may also be importing projects while you're importing, so it's a good idea to click Refresh to ensure you're looking at current import information.
- When you import a project containing a list value that is not set up as a value for a list field or multi-select list field, Cortex Project History imports the project and displays a warning on the Project imports/updates page to let you know the value was not found in validation list. Cortex Project History discards the value and does not update that list field. For multi-select fields, it discards all the values being imported and does not update that multi-select field.
- To clear some or all of the import history from the grid, select the row check circle for every row you want to remove, click Delete, and confirm the deletion. Make sure you no longer need the import template associated with an entry before you delete the row.
You can have a limited number of projects in Cortex 365. When a project import would exceed the maximum number of projects allowed, the import does not complete successfully and the import results notify you that the project limit has been reached. You can see the number of projects allowed and how many have been imported at the top of the Project imports/updates page. If you want an unlimited number of projects, consider upgrading to Cortex Project History.